Configure your development tool
We support most popular options. We strongly recommend using containers to run and debug your apps but local compilation and debugging is also supported. We provide a Docker file in the project template to use as a start and a dev container for VSCode.
Visual Studio
You should be all set, so skip to step 3.
To use Visual Studio's publish feature first install & configure the Samba share Home Assistant addon, then configure your VS publish options:
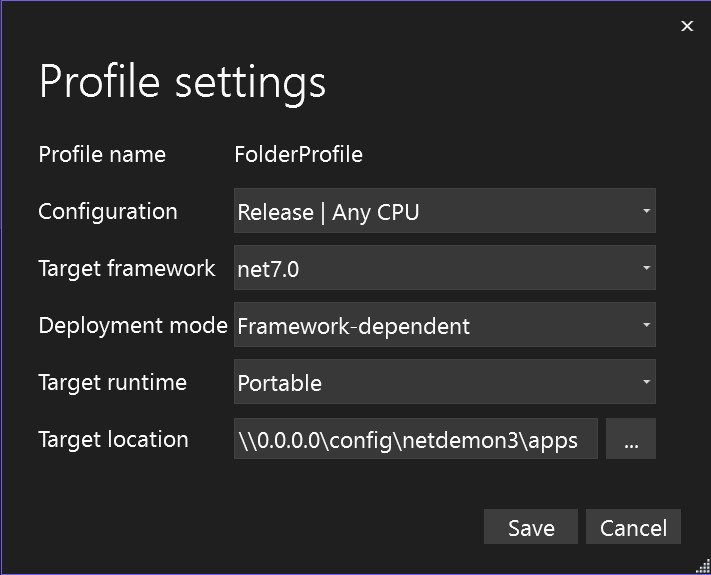
Now you can publish to quickly deploy files, and restart NetDaemon to run them.
Visual Studio Code
Dev Containers are the preferred way to develop your apps. This also requires Docker to be installed. You can also develop and debug directly on your dev machine without Docker.
- Install Remote Development extension in VS Code if you have not already.
- Open folder, the newly cloned template
- Run task:
Dev Containers: Open Folder in Container.... Wait until it fully opened
JetBrains Rider
Just as with Visual Studio it is ready to go for local compile and debugging of your apps.
Rider supports debugging of containerized ASP.Net Core apps from version 2018.2.
Open the netdaemon_app folder in Rider and it should be able to build the projects immediately. A default execute and debug profile will be created however these will be executed as local processes. The preferred way to develop your app is to use a container, which requires Docker to be installed. To configure a container, perform the following steps:
- Locate
Dockerfilein the Solution Explorer window - Right click and select
Debug Dockerfile - This will create a new profile called "DOCKERFILE"
- To view progress, located "Docker" in the "Services" tab and double-click it
- Like all container apps, the first build may take a few minutes - watch the progress in the "Services / Docker" tab
Ensure that the "DOCKERFILE" profile is selected in the toolbar and then Run and Debug will execute within the container.
Studio Code Server Addon
Setup
-
In Home Assistant go to Configurations -> Add-ons, Backups & Supervisor -> Add-on Store -> Menu -> Repositories
-
Add the repository: https://github.com/hassio-addons/repository
-
Install the
Studio Code Server Addon(a0d7b954_vscode) -
In the add-on configuration Tab add the following config:
init_commands:
  - >-
    wget
    https://packages.microsoft.com/config/debian/12/packages-microsoft-prod.deb
    -O packages-microsoft-prod.deb
  - dpkg -i packages-microsoft-prod.deb
  - rm packages-microsoft-prod.deb
  - apt-get update
  - apt-get install -y apt-transport-https
  - apt-get update
  - apt-get install -y dotnet-sdk-10.0
  - dotnet tool install -g NetDaemon.HassModel.CodeGen
packages: []
log_level: info
config_path: /
--> The part in the
init_commandswill install .NET SDK 10.0 only in the Studio Code Server add-on (Docker Container) -
Now you can start the Studio Code Server add-on by going the add-on information tab and pressing
OPEN WEB UI.
HINTS:
- It is recommended to install the C# Extensions (ms-dotnettools.csharp) in Studio Code Server to get Semantic Highlighting and IntelliSense.
- Open only the folder where the solution/project is located to ensure that the C# Extension works properly.