Install NetDaemon runtime
You can deploy your NetDaemon apps in several ways:
- Using the NetDaemon Home Assistant add-on
- Using the NetDaemon Docker container
- Custom deployment (will not be covered here)
Deploying NetDAemon using the Home Assistant add-on
Once added to Home Assistant, select one of the V6 versions.
- Create a folder structure under your Home Assistant host configuration directory to store NetDaemon apps:
/config/netdaemon6
- Add the NetDaemon repository to the Home Assistant add-on store:
https://github.com/net-daemon/homeassistant-addon
- Install the NetDaemon add-on from Home Assistant add-on store:

Publish and copy compiled NetDaemon apps
Publish the .NET project created from the CLI tool:
dotnet publish -c Release -o [outputdir]
Copy all files and folders within the [outputdir]
to /config/netdaemon6 on your Home Assistant host.
For more details how to make this step easier, see the tutorial Publish NetDeamon apps with Powershell.
Configure the NetDaemon add-on
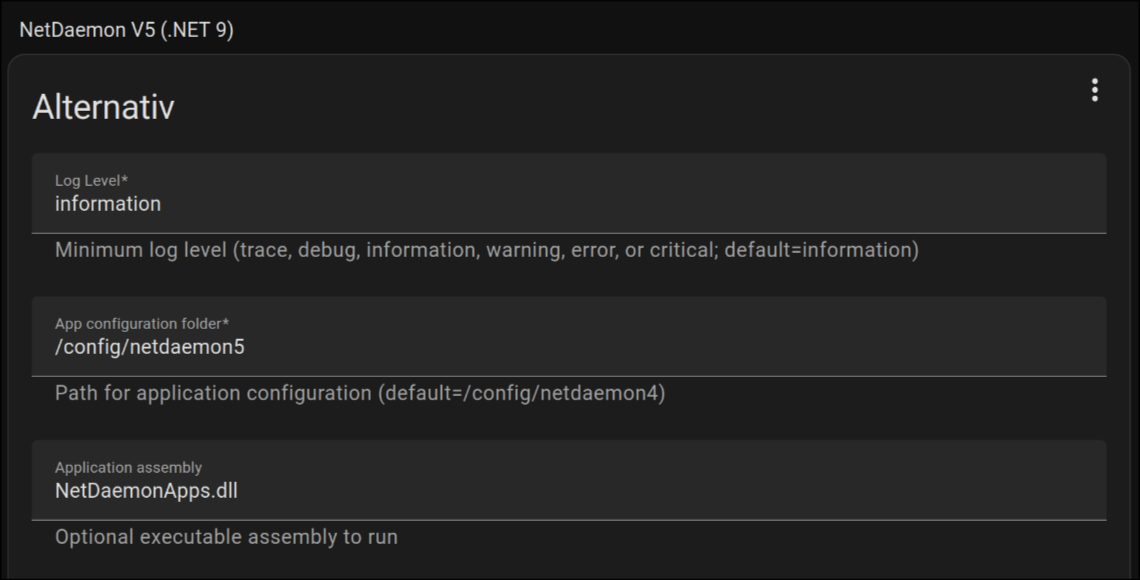
In the add-on configuration, set Application assembly setting
to the path for your project's entry assembly (DLL),
relative to /config/netdaemon6 folder.
Optionally, specify a separate path for configurations.
This is an example of how the configuration should should look like, please replace the assembly name with your own assembly name:

The name of the assembly may be different or current dotnet version might be different for you. Ensure you're using the latest NetDaemon version and the corresponding .NET SDK. Make sure to always use the latest NetDaemon release.
Deploy using Docker and the official NetDaemon image
If you're using Home Assistant Core without add-on support, deploying NetDaemon in a Docker container is a convenient alternative.
Note: Always use a specific version tag instead of latest to avoid potential breaking changes. Find the version of the latest stable version here
Example Docker run configuration
docker run -d \
  --name netdaemon6 \
  --restart=always \
  -e HomeAssistant__Host=192.168.1.4 \
  -e HomeAssistant__Token="eyJhbGciOiJIUz..." \
  -e NetDaemon__ApplicationAssembly=NetDaemonApps.dll \
  -e Logging__LogLevel__Default=Information \
  -e TZ=Europe/Stockholm \
  -v ~/netdaemon_config:/data \
  netdaemon/netdaemon6
Example using docker-compose.yaml for
services:
  netdaemon:
    image: netdaemon/netdaemon6                 # use netdaemon/netdaemon6:ver
                                                # for specific version
    container_name: netdaemon6
    restart: always
    environment:
      - HomeAssistant__Host=your_ip_or_hostname # use host.docker.internal if HA in container (see section below)
      - HomeAssistant__Token=your_token
      - NetDaemon__ApplicationAssembly=NetDaemonApps.dll
      - Logging__LogLevel__Default=Information  # use Information/Debug/Trace/Warning/Error
      - TZ=Etc/UTC                              # Set your current timezone
    volumes:
      - /config/netdaemon:/data                 # replace /config/netdaemon
                                                # to your local folder
    # extra_hosts:                              # Enable if HA in
    #     - "host.docker.internal:host-gateway" # container
Environment variables
The Docker container needs these environment variables to run properly.
| ENV | Description |
|---|---|
HomeAssistant__Host | The host that is running Home Assistant (defaults to localhost) |
HomeAssistant__Port | The port Home Assistant is running on (default to 8123) |
HomeAssistant__Ssl | Set to True if SSL is used to access Home Assistant. |
HomeAssistant__Token | A Long Lived Access Token(LLAT) that NetDaemon can use for the communication with Home Assistant. |
HomeAssistant__InsecureBypassCertificateErrors | Ignores certificate errors. Please use at own risk. |
NetDaemon__ApplicationAssembly | DLL name for compiled deployments (omit for source deployments) dllname.dll |
Logging__LogLevel__Default | Defaults to Information, values are (Trace, Debug, Information, Warning, Error) |
TZ | You will need to set container time zone to make the scheduler work properly |
NetDaemon__ApplicationConfigurationFolder | If you want to select another folder for your YAML configurations. Standard is /data |
Volumes
| Vol | Description |
|---|---|
| /data | The volume of the NetDaemon folder should be mapped to /data |
Connecting to the Home Assistant container
If you are trying trying to connecto to Home Assistant from the
NetDaemon container, localhost will not resolve to the actual host
machines loop-back ip, but rather the NetDaemons container's internal
loopback ip.
If Home Assistant is running either directly on the host or in a container using
network_mode: host you will have to configure your NetDaemon container to
resolve the actual ip. This can be achieved by setting the HomeAssistant__Host
environment variable to host.docker.internal
(and if on Linux, adding the field extra_hosts
with the value host.docker.internal:host-gateway)
For more info, see this post on Stack Overflow.
If Home Assistant is not using host mode networking, then the previous method should
work, but you can also set the HomeAssistant__Host variable to the name of the
HA container instead, without adding the extra_hosts field.
Note, that the LLAT for the user must not have the setting
"Local access only" in Home Assistant.