Add webserver to NetDaemon
Goal
This guide shows how to tweak the original NetDaemon template in order to spin up a Kestrel webserver that hosts
- a minimal API
- a Web API controller
- Blazor server pages (which can even be embedded in lovelace - at least locally.)
You can easily update your existing ND solution by simply following the steps described in this document.
Motivation
There are scenarios where you want to provide data via RESTful services or WebSocket instead of storing everything in a HA entity. Or maybe you want to render complex UI without becoming a lovelace wizard, instead leveraging your .NET skills. Using Blazor Server and visualizing the output in a lovelace iframe-card might be an option. (Including hassle-free live updates, e.g. from your sensor data.)
Steps
Change the SDK in the csproj file to
<Project Sdk="Microsoft.NET.Sdk.Web">
In program.cs, change from IHostBuilder to the WebApplicationBuilder.
The ND configuration remains the same.
var builder = WebApplication.CreateBuilder(args);

builder.Host
    .UseNetDaemonAppSettings()
    .UseNetDaemonDefaultLogging()
    .UseNetDaemonRuntime()
    .UseNetDaemonTextToSpeech()
    .UseNetDaemonMqttEntityManagement()
    .ConfigureServices((_, services) =>
    {
        services
            .AddAppsFromAssembly(Assembly.GetExecutingAssembly())
            .AddNetDaemonStateManager()
            .AddNetDaemonScheduler()
            .AddHomeAssistantGenerated();
    });
Configuring MVC and Blazor services
// adding MVC / WebAPI controllers
builder.Services.AddControllers();

// Blazor Server
builder.Services.AddRazorPages();
builder.Services.AddServerSideBlazor();
Configuring Kestrel Port and certificate
// Kestrel on port 10000
// TODO: SSL
builder.WebHost.ConfigureKestrel(options =>
{
    options.ListenAnyIP(10000);
});
Defining minimal API operations
// minimal API
app.MapGet("/mini", () => "Hello from Minimal API!");
Finally setting up Routing and Endpoints
// use controller routes
app.MapControllers();

// configure Blazor
app.UseStaticFiles();
app.UseRouting();
app.MapBlazorHub();
app.MapFallbackToPage("/_Host");

await app.RunAsync();
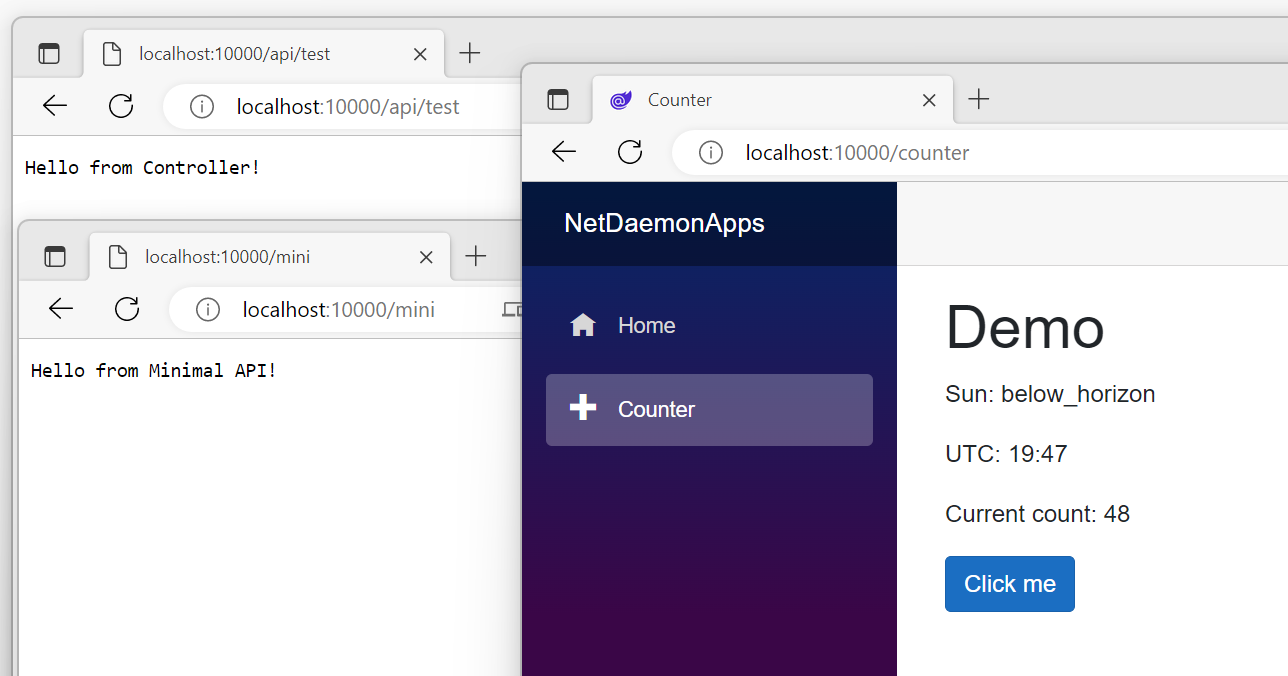
Starting the project with F5 Debug mode runs the ND Apps. You can easily check the added functionality hosted on Kestrel from a browser.
When adding Blazor artifacts from a different solution, search for all occurrences of the old project name and replace it with the new namespace. In case you still run into problems, close and reopen Visual Studio.
In this demo, I just copied the components of the default Blazor project into the solution and modified only the Counter.razor file to show
how easy it is to inject the ND services and use the generated HA classes.
@page "/counter"

<PageTitle>Counter</PageTitle>
<h1>Demo</h1>

<p role="status">Sun: @Entities.Sun.Sun.State</p>
<p role="status">UTC: @Entities.Sensor.TimeUtc.State</p>

<p role="status">Current count: @currentCount</p>
<button class="btn btn-primary" @onclick="IncrementCount">Click me</button>

@code {

    [Inject]
    public IScheduler Scheduler { get; set; } = null!;

    [Inject]
    public Entities Entities { get; set; } = null!;

    protected override void OnInitialized()
    {
        // update the counter automatically every second, using the wellknown IScheduler
        Scheduler.SchedulePeriodic(TimeSpan.FromSeconds(1), async () =>
        {
            await InvokeAsync(() =>
            {
                IncrementCount();
                StateHasChanged();
            });
        });
    }

    private int currentCount = 0;

    private void IncrementCount()
    {
        currentCount++;
    }
}
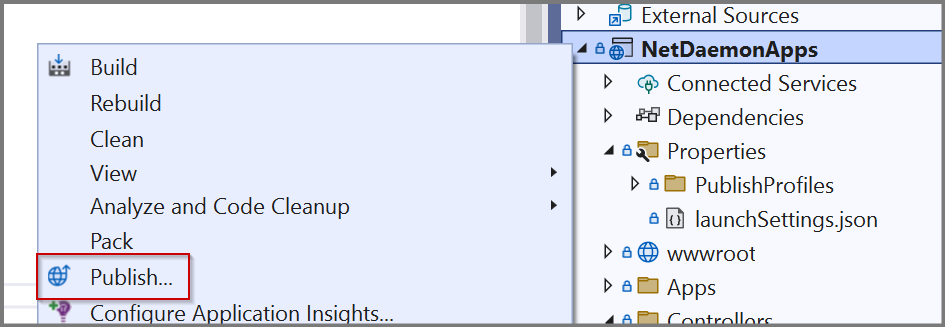
Now let's deploy the whole thing.
While it is perfectly fine to copy the binaries to /config/netdaemon6 for a normal NetDaemon project, it will fail for Blazor.
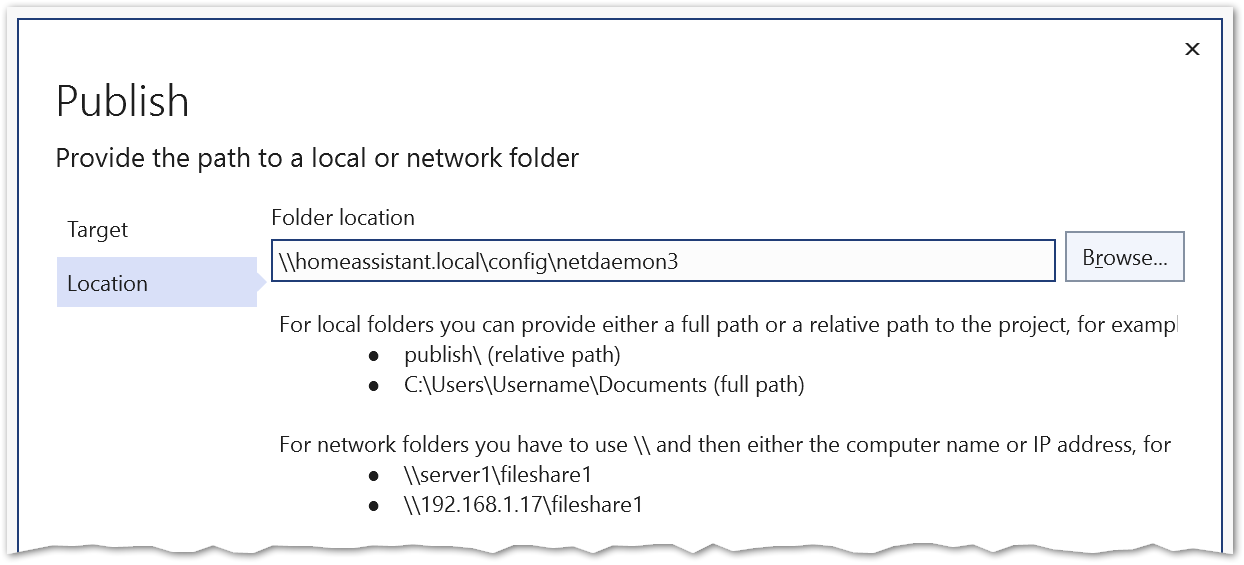
We need to Publish the WebSite in order to build the web artifacts in wwwroot.
Just select Folder as target and configure the location.
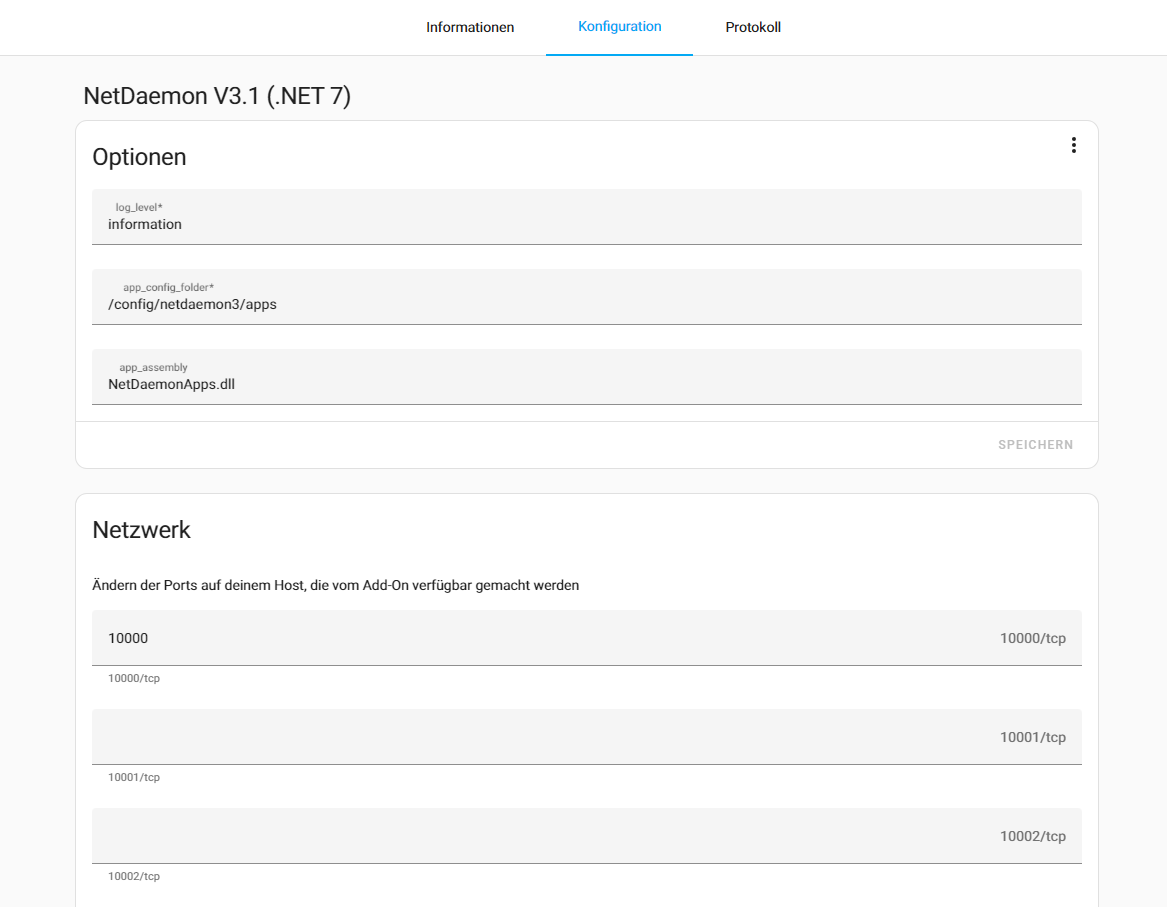
After every publishing, the NetDaemon AddOn needs to be restarted.
There's one final - but important! - step: you need to enable and map the port where the Kestrel is listening in the configuration section of the AddOn.
Limitations
The Kestrel server will not be available via your Nabu Casa cloud link as it only directs to your HA port on :8123.